
If you love Twix candy bars as much as I do, you have to try my shortbread Twix cookies! These easy gluten free cookies are made without eggs and are topped with caramel and milk chocolate.
If you enjoy these cookies you will LOVE my millionaire's cheesecake, chocolate dipped shortbread and my espresso shortbread cookies!
Guys, this one is good. Really good. Twix easily tops my list of all-time favorite candy bars. Although if I'm being honest, it's a tie between Twix and Kit Kats. But I digress.
When I sat down recently to brainstorm some cookie ideas, a gluten free shortbread Twix cookie recipe came to mind instantly. If you can no longer have a Twix candy bar due to the wheat, these cookies are a great alternative!
The cookie itself is a simple yet delicious gluten free shortbread. Once you top it with caramel, then melted milk chocolate... let's just say it'll be hard to have just one!
I will warn you, these homemade Twix cookies take a little patience and commitment. They're definitely not hard to make by any means, but there are several steps and lots of chill time is required.
But I also take a few shortcuts to make it easier, like using canned dulce de leche for the caramel layer. I opted to use dulce de leche because it doesn't contain corn syrup, unlike a lot of store-bought caramels.
Jump to:
Why You'll Love This Recipe
- Simply because they actually taste like gluten free Twix. That was the exact feedback I received from my tester (aka my husband, Matt). I couldn't have been more thrilled to hear it 🙂
- The fact that this is a slice and bake cookie recipe makes it easier. You don't need to roll out the dough or use cookie cutters.
- The cookie recipe calls for just 4 ingredients (excluding the caramel and chocolate topping) and is made without eggs (no egg replacer needed here).
Ingredient Notes and Substitutions
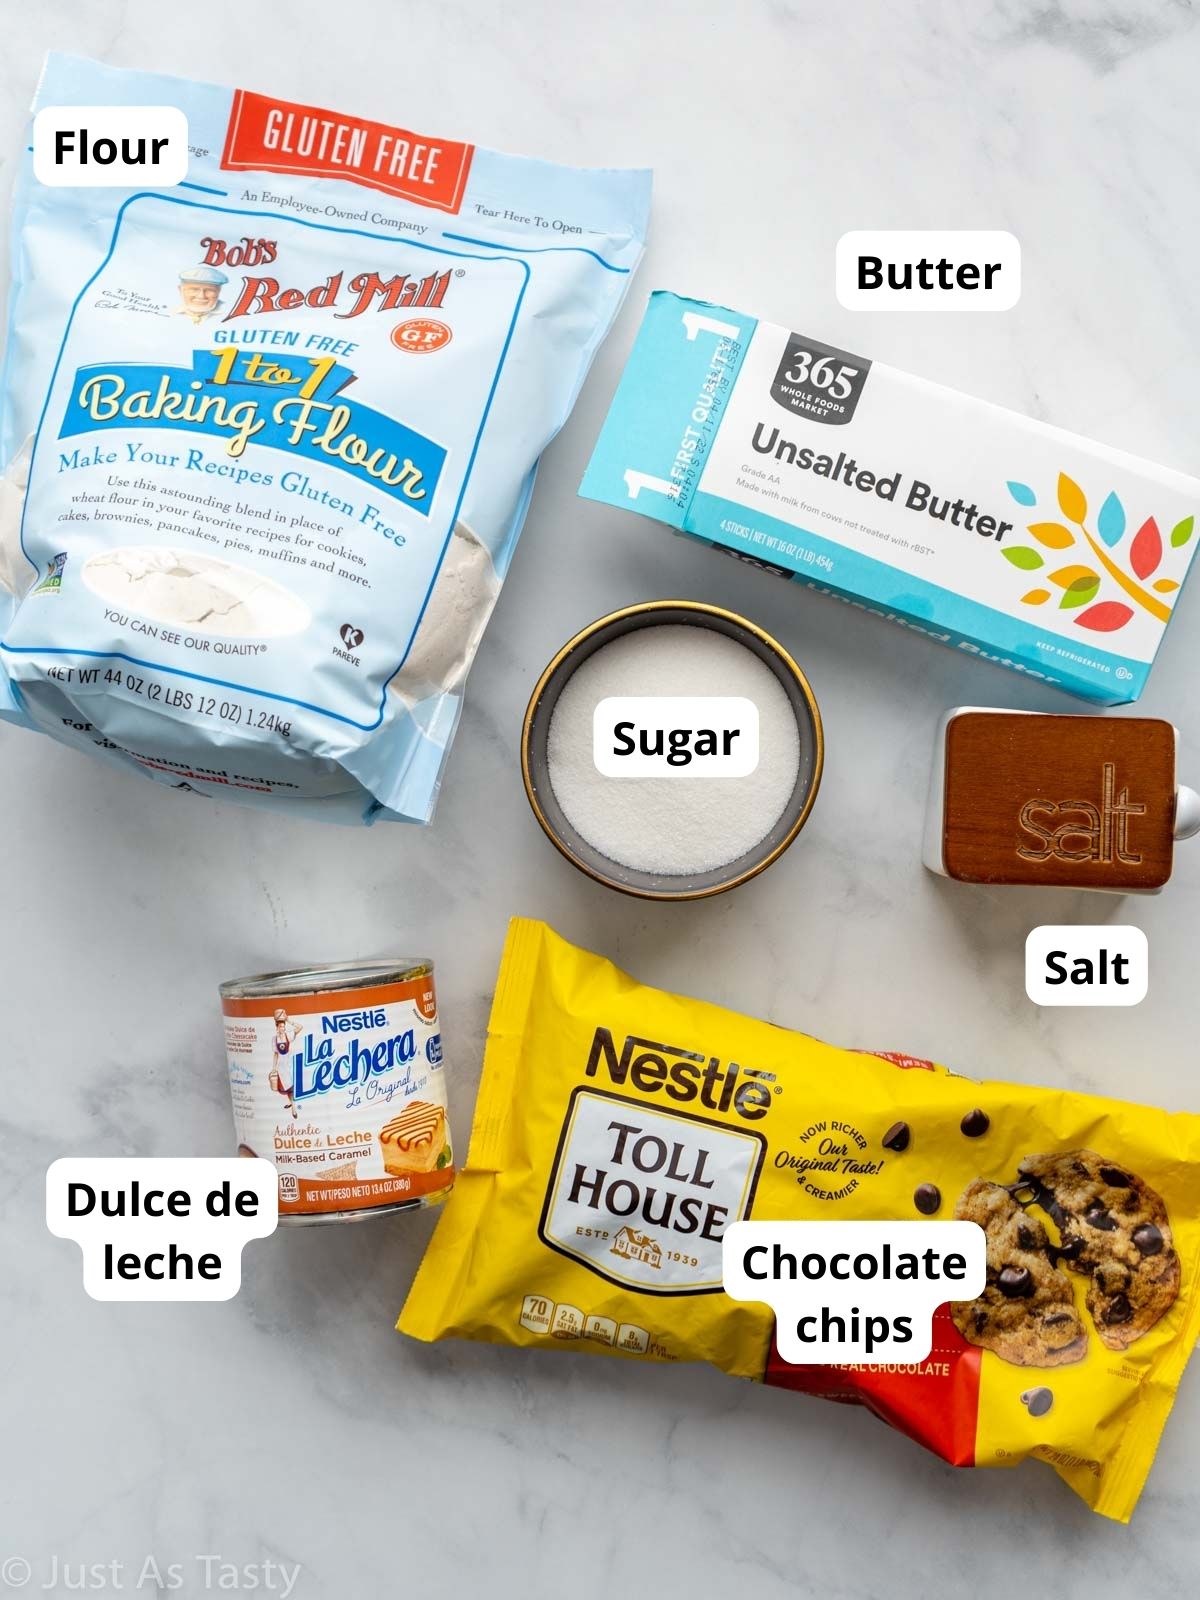
- Gluten free flour: My favorite gluten free flour blend is Bob's Red Mill 1 to 1 flour. It simply never lets me down! You can use any gluten free blend for this recipe, just make sure it contains xanthan gum. You can NOT substitute almond flour, or any other nut flour.
- Chocolate chips: If you truly want to recreate that Twix flavor profile, you'll need milk chocolate chips. But between you and me, these are Just As Tasty with semisweet!
- Dulce de leche: This is easy to find at most major grocery stores. It's usually in the baking aisle, near the sweetened condensed milk. If you can't find it or would rather make your own, I talk more about how to make dulce de leche in this post.
Step-By-Step Instructions
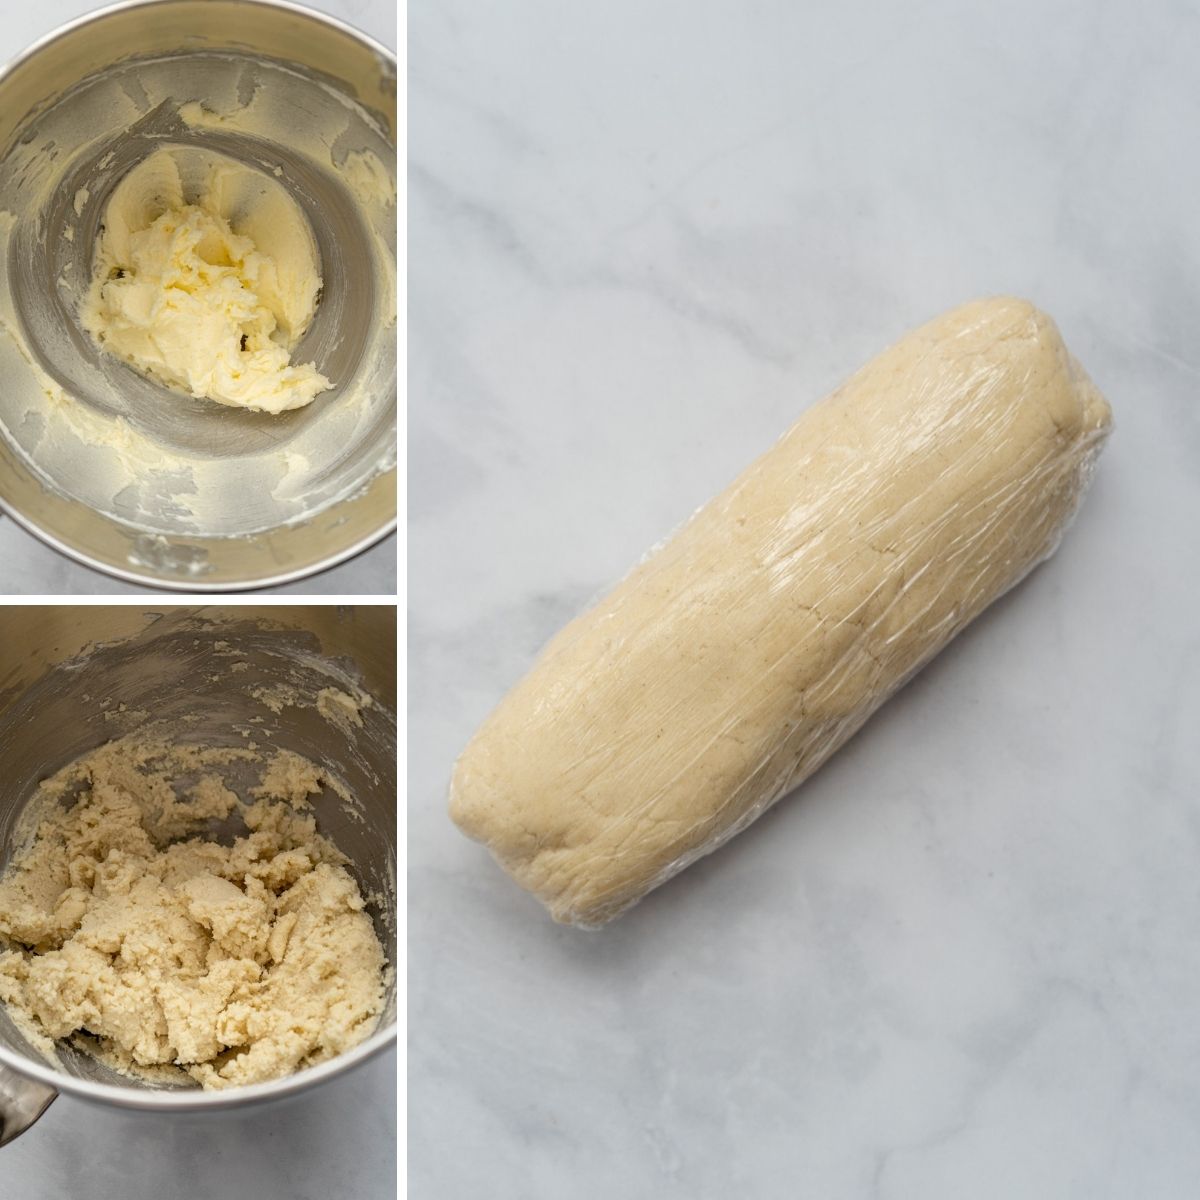
Cream the butter with the sugar and salt. You'll want this mixture to look nice and creamy, and slightly lighter in color.
Add in the flour and continue beating until it's fully combined.
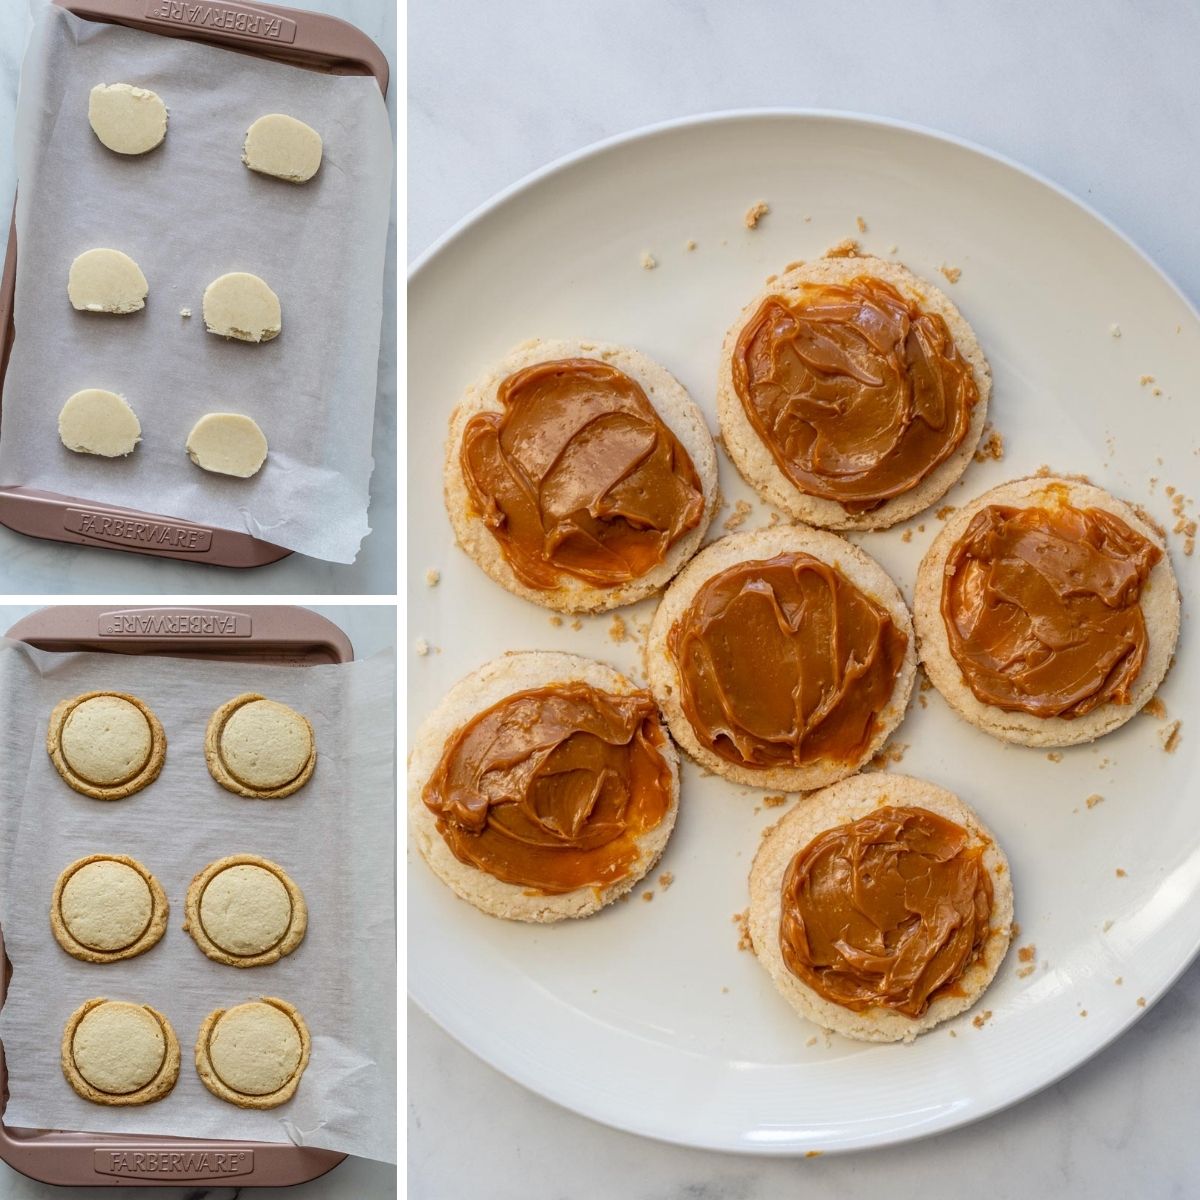
Chill the cookie dough. Transfer to a large sheet of plastic wrap and roll it into a log shape, making sure it's tightly wrapped. Chill for at least 2 hours.
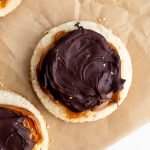
Slice and bake. Slice up the cookie dough and arrange onto your baking sheet. Bake about 22 minutes on 350ºF and allow to cool completely.
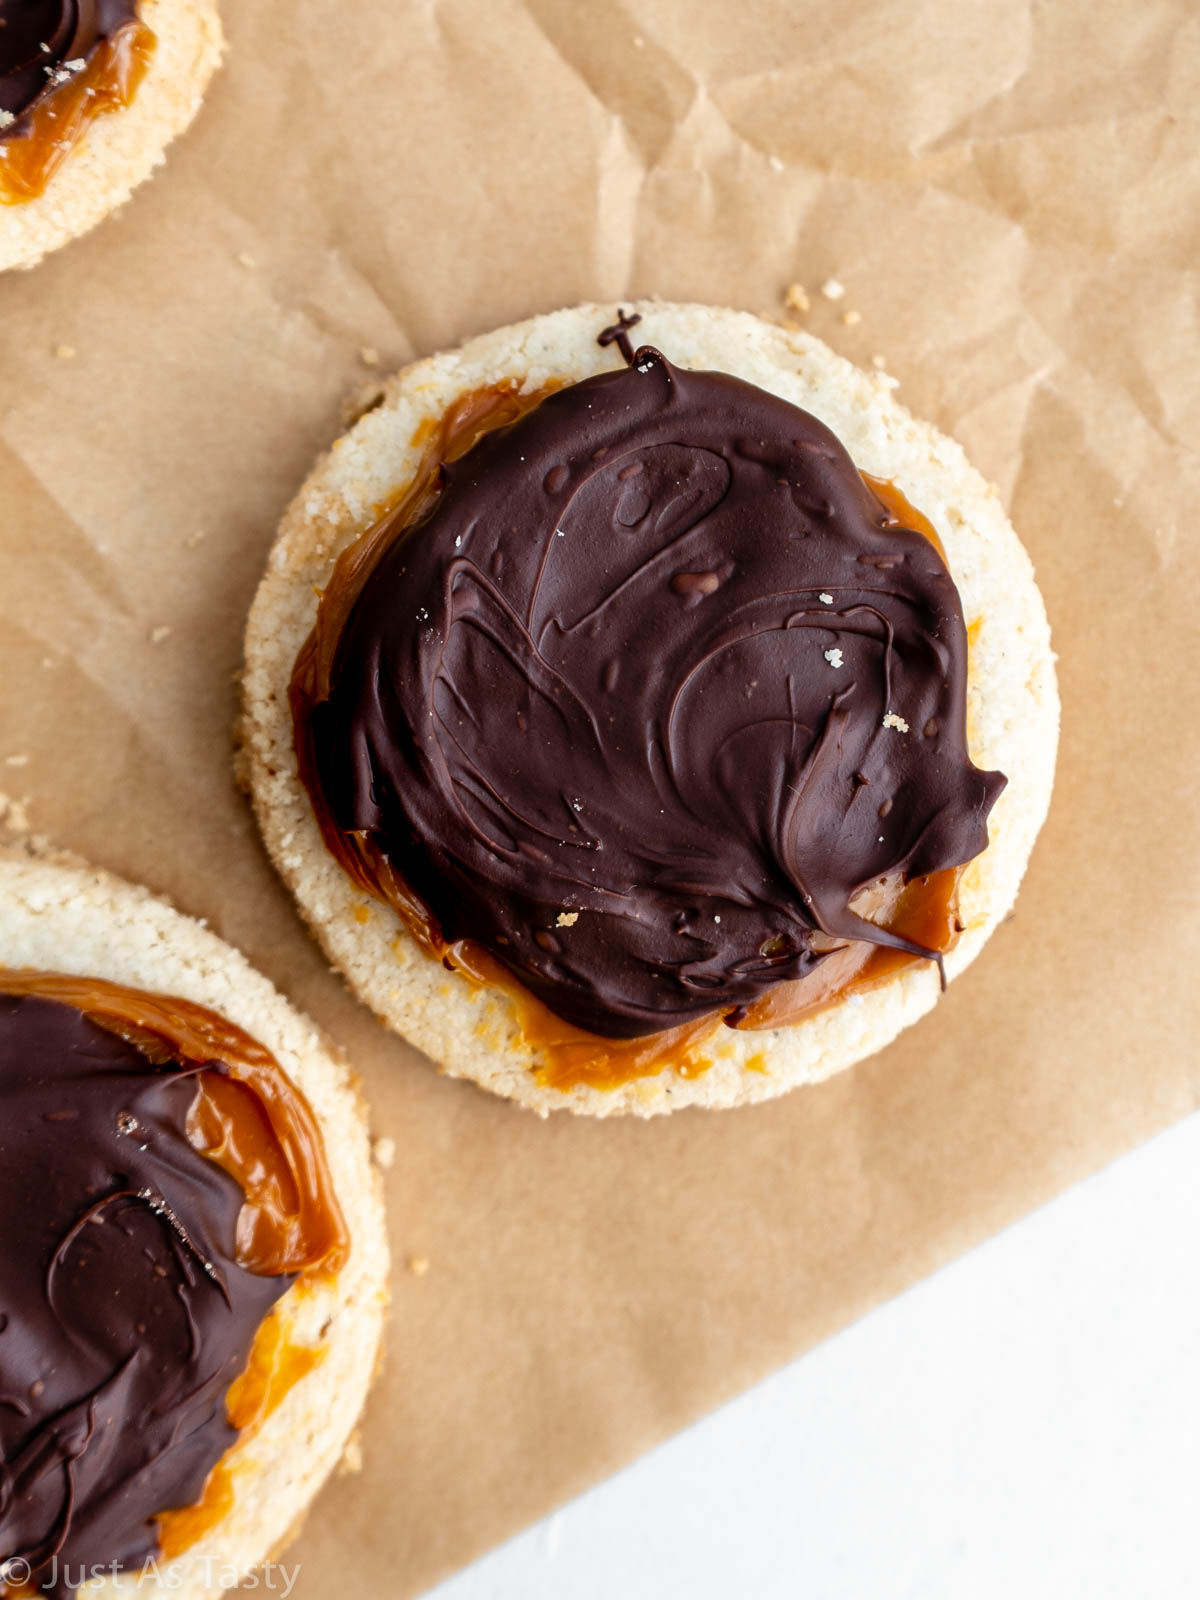
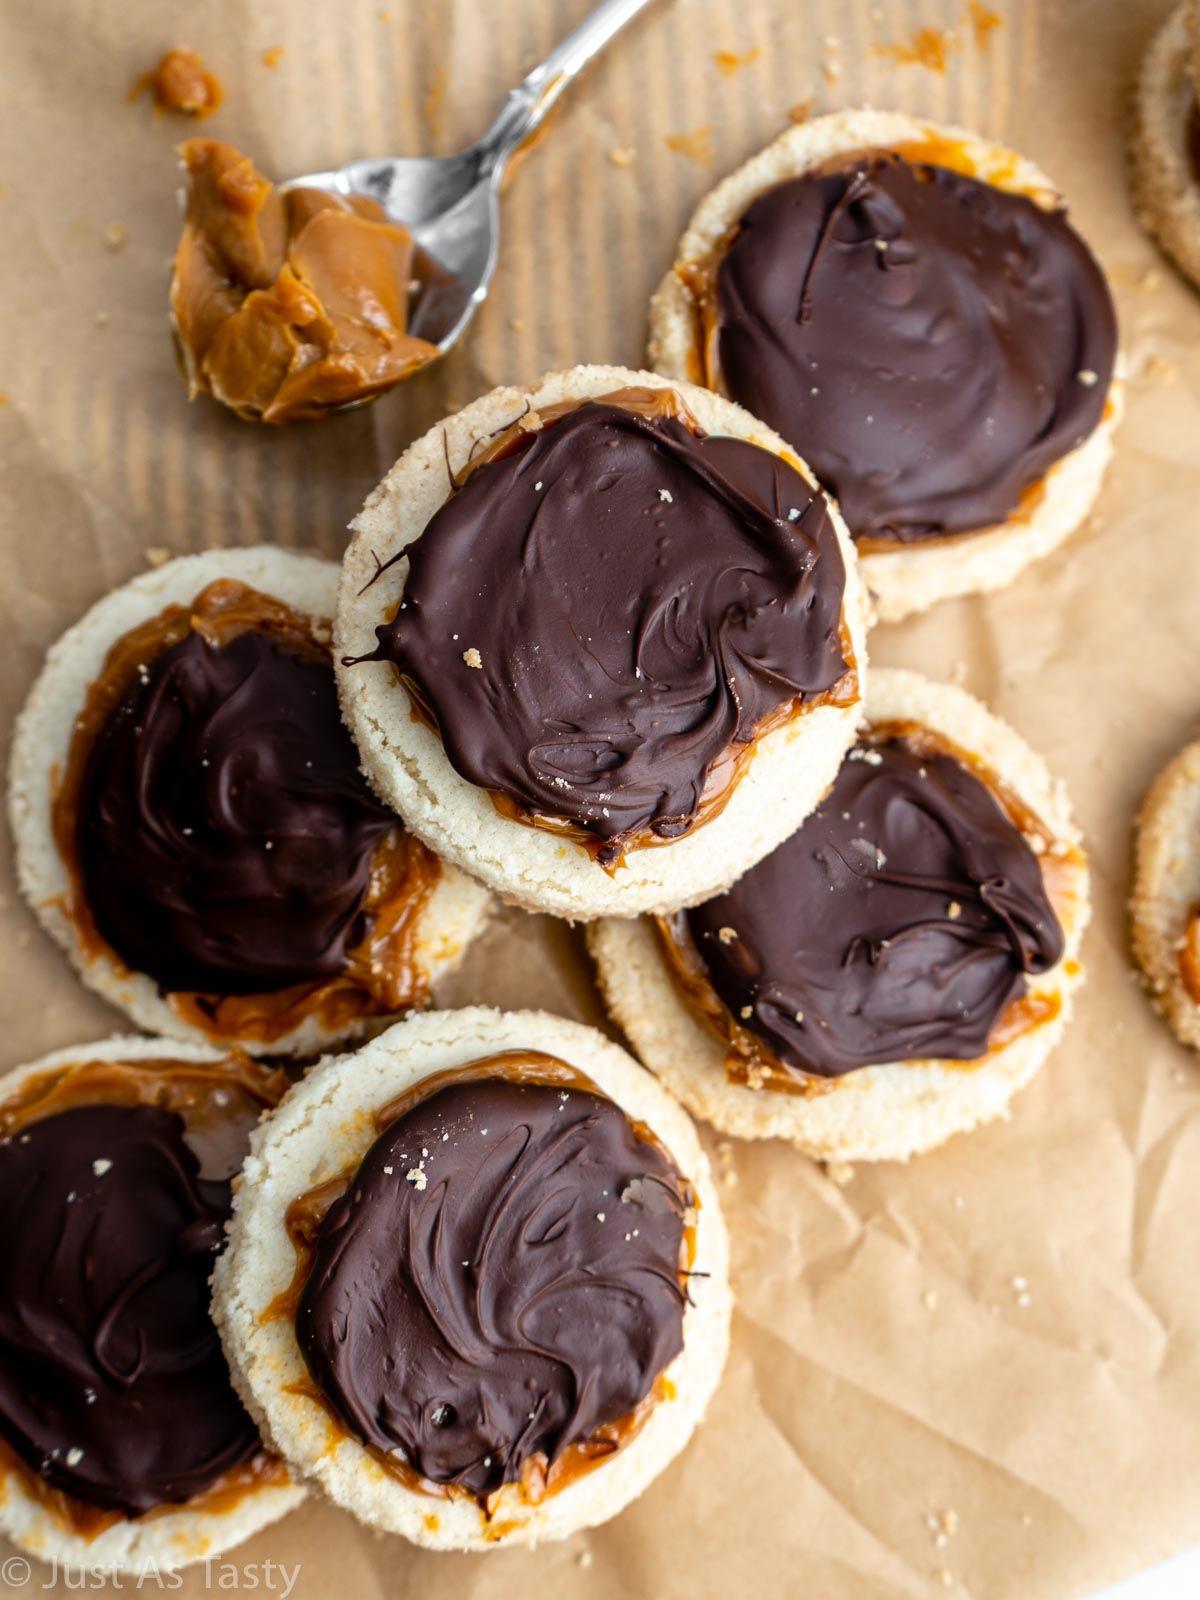
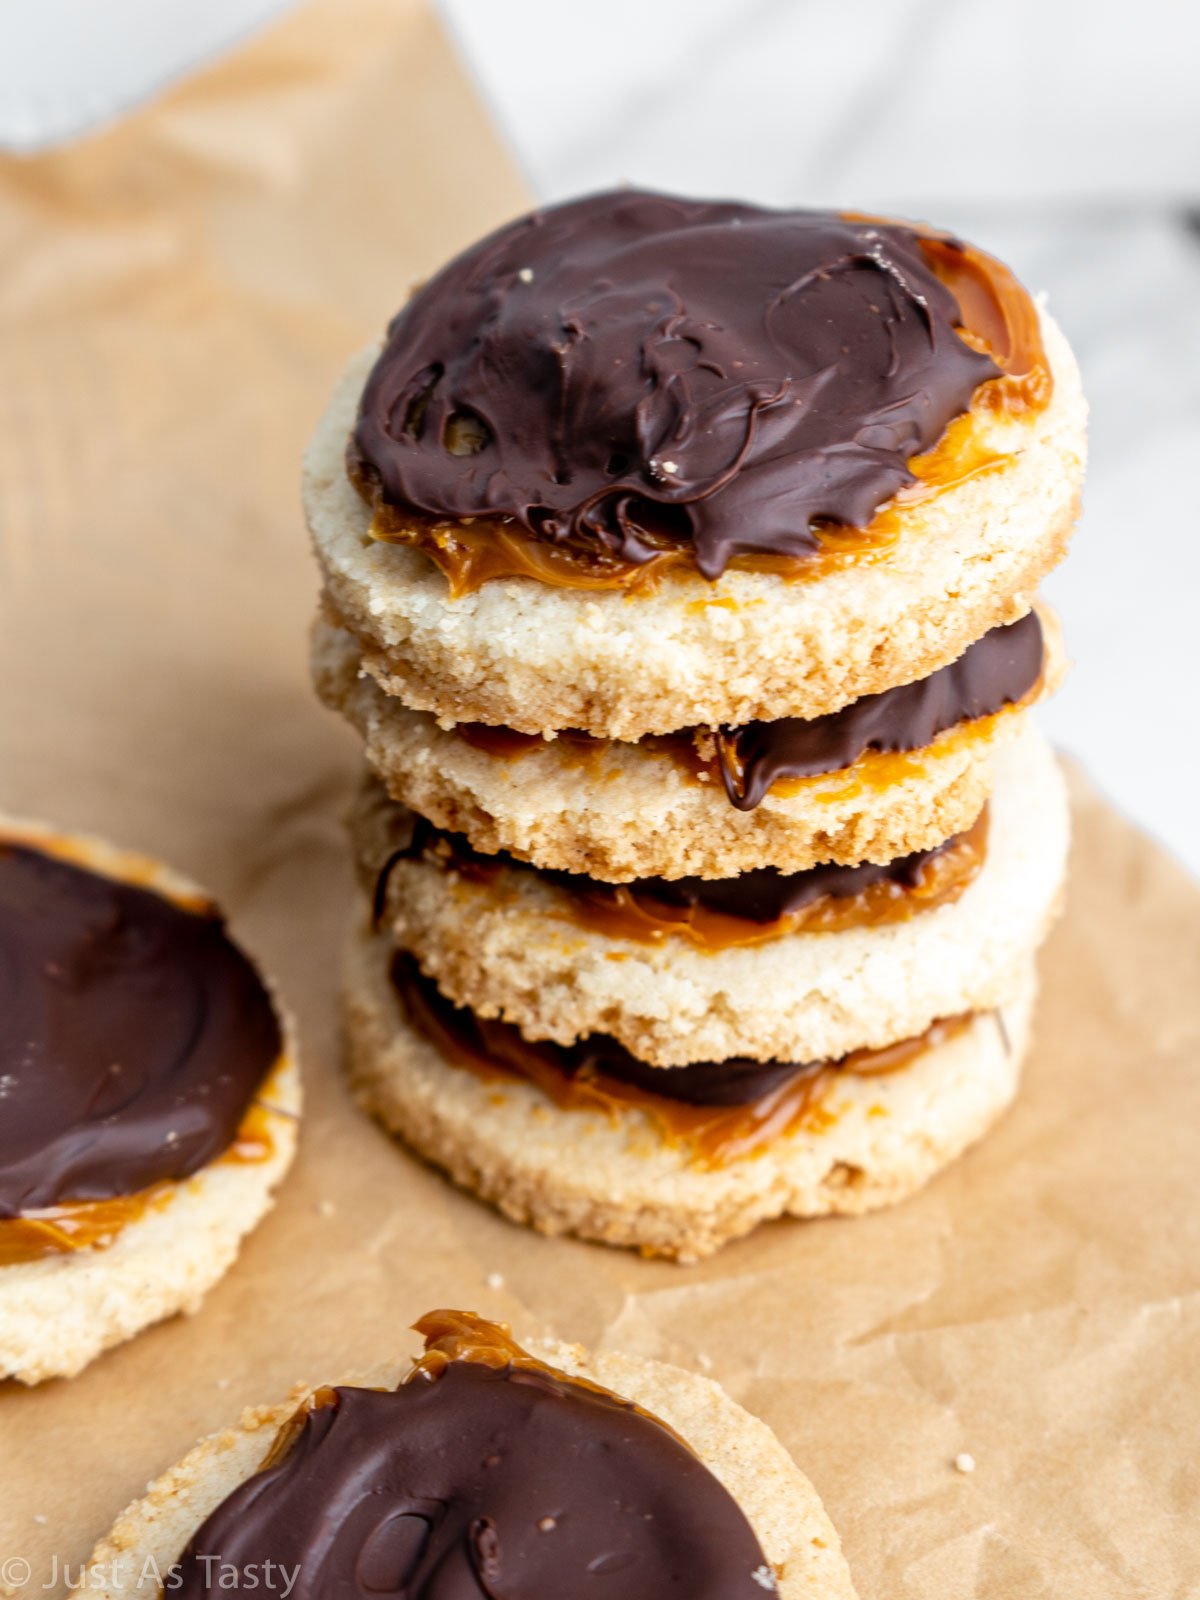
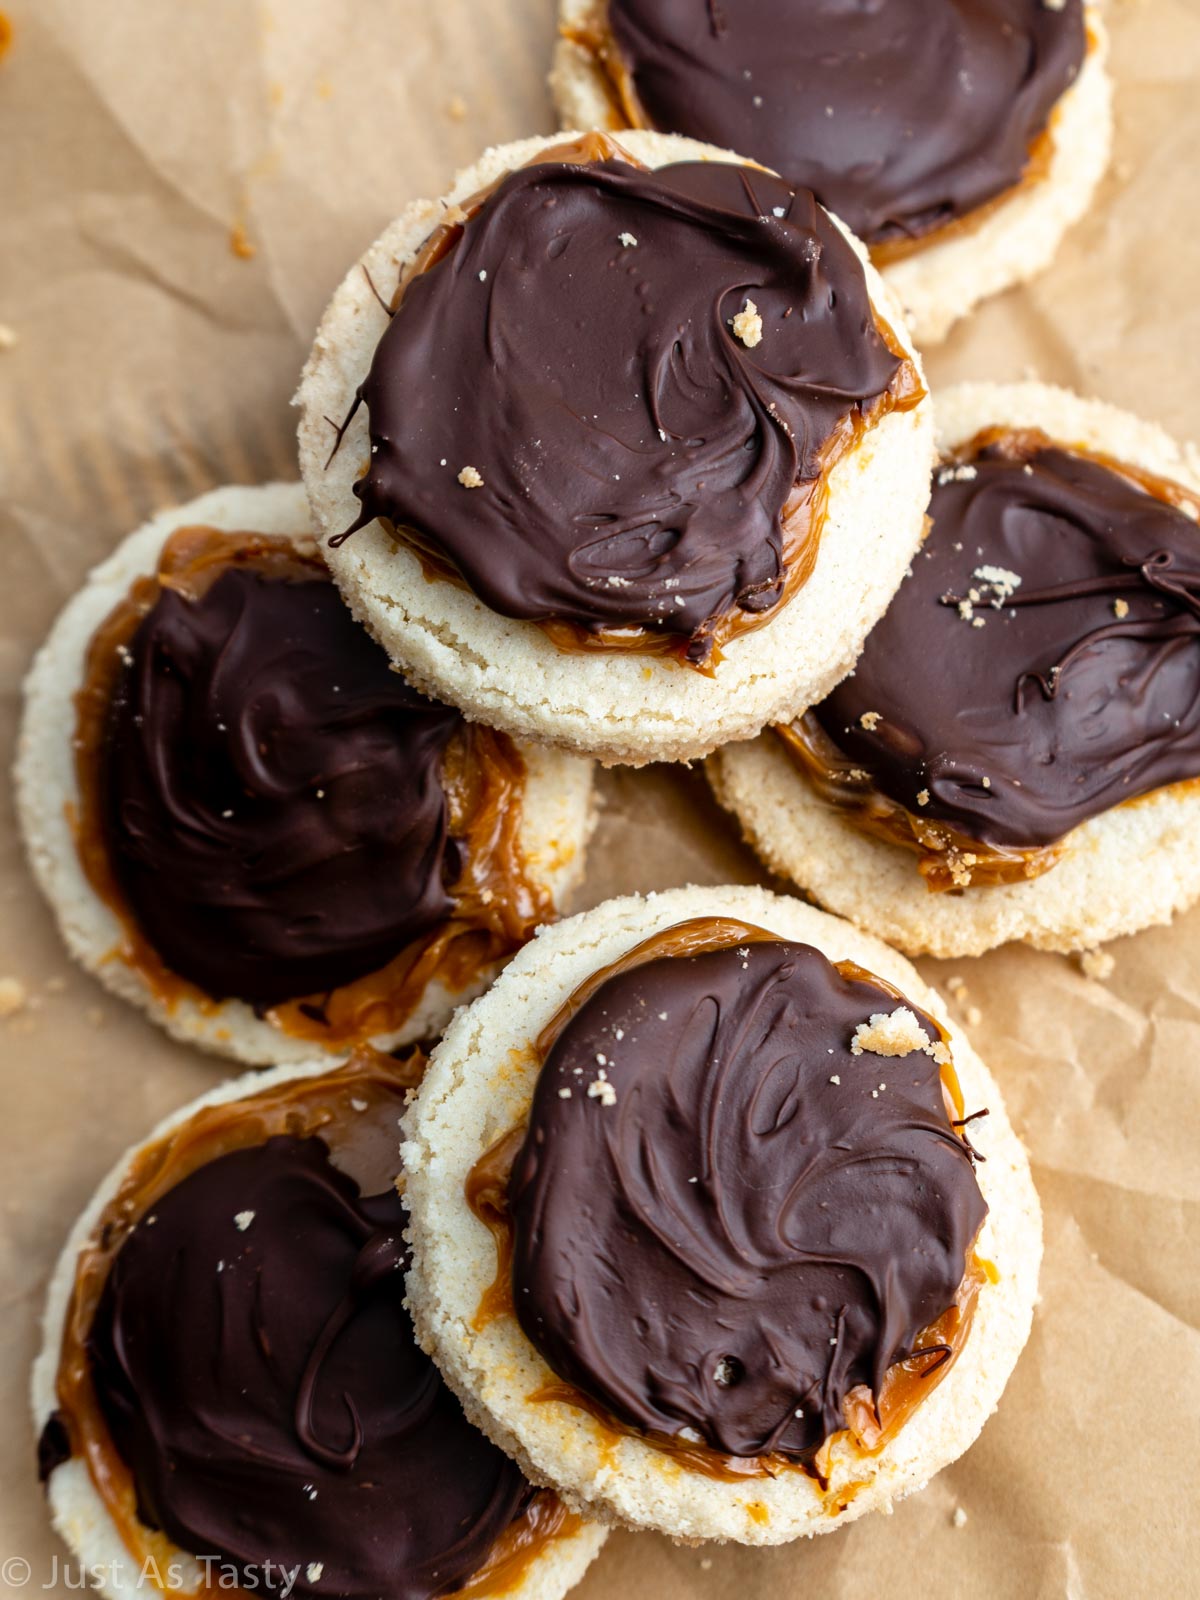
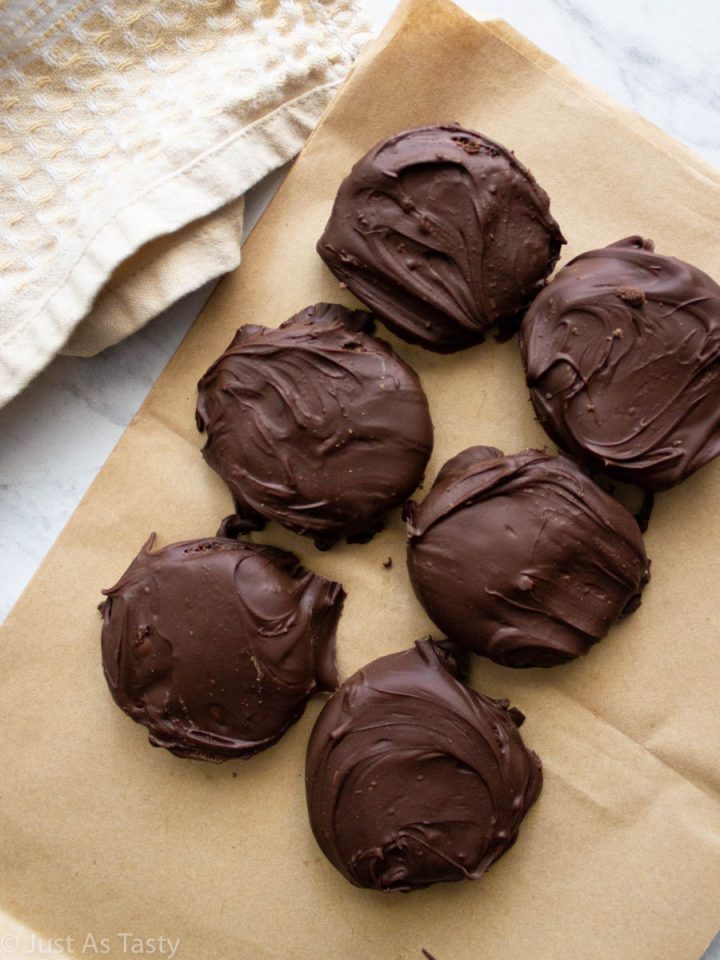
Top with dulce de leche and chocolate. Start with the caramel layer first. Pop the cookies into the refrigerator to set before adding the chocolate layer (just melted milk chocolate chips) on top.
Expert Tips
- The best way to measure flour is actually to weigh it using a scale. This is the only way to ensure accuracy, which is important in baking (especially gluten free baking). We'll need 296 grams of flour for this recipe.
- The chill time is so important that I recommend leaving the cookie dough in the refrigerator while your oven preheats. Pull it out and start slicing at the very last minute, when you're ready to pop them in the oven.
- For perfectly round and uniform Twix cookies, I will take a round cookie cutter (the rim of a clean glass will also work in a pinch) and, while the cookies are still warm and soft, I will cut them into rounds. This is optional and more for presentation. But if you do cut your cookies, don't attempt to move them until they've cooled.
- I like to pipe a bit of the dulce de leche onto the center of each cookie and spread with a butter knife. You can also just spread it on if that's easier for you.
Frequently Asked Questions
Twix bars are made with a shortbread base. So that's exactly why this recipe had to be shortbread Twix cookies. The base is super buttery and made with minimal ingredients (no leavening agents or eggs).
To make these shortbread cookies vegan, you would need to use your favorite non-dairy butter. You'd also need to find dairy free sweetened condensed milk (typically that would be sweetened condensed coconut milk) and make your own dulce de leche. Alternately, you can use any dairy free, gluten free caramel sauce. Make sure to use dairy free chocolate chips.
It can often be tempting to skip this step in a cookie recipe, but it's always there for good reason. You have to chill the cookie dough to prevent spreading. We're working with a good amount of butter, and we need it to be cold when it goes into the oven.
Yes, if you can't find dulce de leche and/or would rather not make your own, you can use any gluten free caramel sauce (store bought or homemade).
How To Store
I recommend storing these homemade Twix cookies in an airtight container in the refrigerator for up to 5 days. You can also freeze these cookies, or the raw cookie dough. They should keep in the freezer for up to 3 months.
Did you try my shortbread Twix cookies? Leave me a comment below or tag me on Instagram @justastastyblog and #justastastyblog! And don't forget to subscribe to get new recipes directly in your inbox.
Just As Tasty: Gluten-Free & Eggless Baking Through the Seasons
Be sure to check out my cookbook for tons of festive and easy-to-make gluten-free treats! From Valentine's Day and Easter to the holiday season and every celebration in between, this book has got you covered.
📖 Recipe
Best Shortbread Twix Cookies - Gluten Free
Ingredients
- 1 cup (226g) unsalted butter room temperature
- ½ cup (100g) granulated sugar
- ½ teaspoon fine sea salt
- 2 cups (296g) gluten free flour blend
- ½ cup (190g) dulce de leche
- 1 cup (170g) milk chocolate chips
Instructions
- Using a stand mixer with the paddle attachment, cream the butter with the sugar and salt. Add in the flour and continue to beat until combined.
- Transfer the dough onto a piece of plastic wrap and roll into a log, twisting the ends so that it's tightly wrapped. Chill in the refrigerator for at least 2 hours.
- Preheat the oven to 350°F, keeping the dough in the refrigerator until the oven is ready to use. Remove dough from the refrigerator, unwrap, and slice into ½ inch rounds. Arrange cookies on a lined baking sheet and bake for 22-24 minutes. Allow the cookies to cool on the baking sheet for 10 minutes, then transfer to a cooling rack to cool completely before moving on to the next step.
- Once the cookies are completely cooled, spoon or pipe dulce de leche onto centers of each cookie, and spread to cover the surface as necessary. Chill cookies in the refrigerator for at least 30 minutes.
- In a microwave safe bowl, melt the chocolate candy coating or chocolate chips on 50% power in 30 second intervals, stirring between each interval. Spread a small amount of melted chocolate directly on top of the caramel layer. Allow cookies to set before serving.
Notes
- The amount of caramel and chocolate used on each cookie is entirely up to personal preference -- there's virtually no right or wrong amount to use. However, depending on how thick your layers are, you may need more dulce de leche and/or chocolate candy coating than I've specified here.
- For me, the recipe yields just about 14 cookies but this can vary based on how thick or thin you slice your cookies.
- For perfectly round and uniform cookies, I like to use a round cookie cutter when the cookies are still warm and soft, to further reinforce the round shape. Do not attempt to pull the cut cookies off until they have cooled.


Leave a Reply